

In emergencies where every second counts, having the knowledge and confidence to perform CPR procedure makes the difference between life and death. CPR is a critical first aid technique used to sustain blood flow to vital organs when someone's heartbeat or breathing has stopped. Knowing the correct procedure for CPR is essential, as it significantly increase the chances of survival for the victim. Here is the correct procedure of CPR:
- Assess the Scene: Before approaching the victim, ensure the surrounding area is safe for both you and the casualty. Look for any potential hazards or dangers that could pose a risk to your safety.
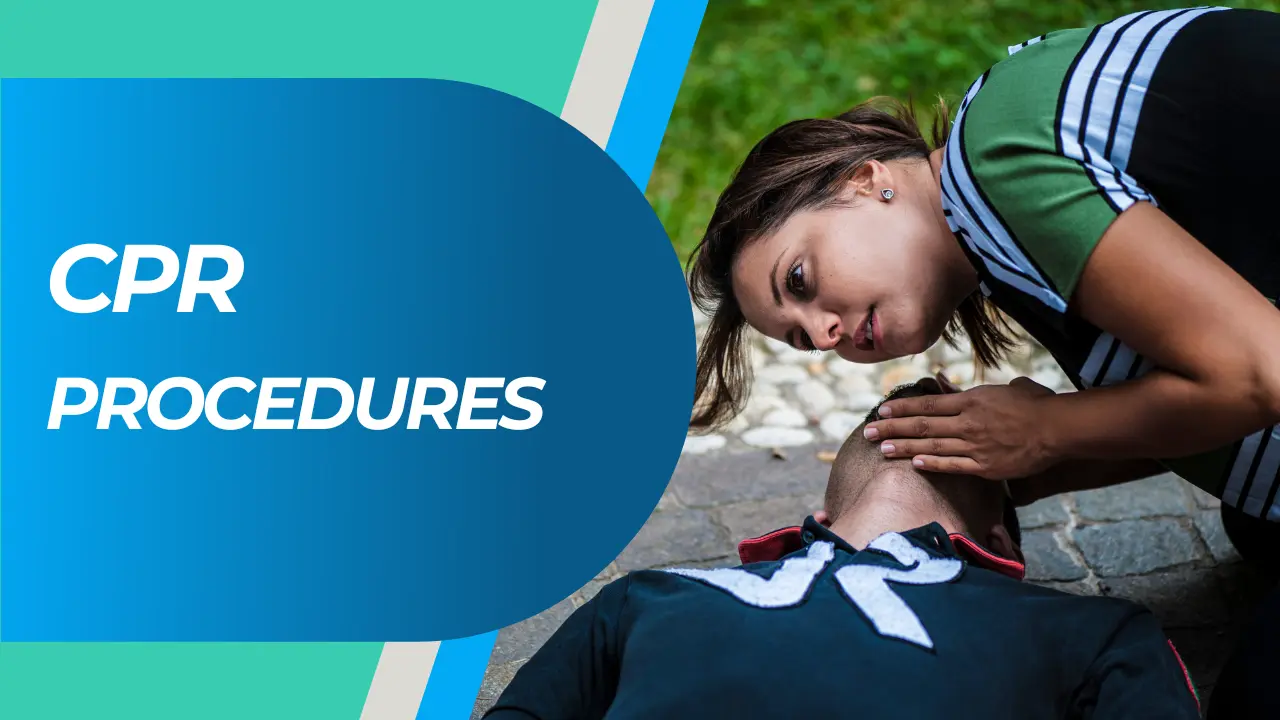
- Check Responsiveness: Tap the victim gently and shout loudly to assess their responsiveness. If there is no response, immediately call for help or instruct someone nearby to call emergency services (911).
- Open the Airway: Carefully tilt the victim's head backward while lifting the chin forward to open the airway. This position helps ensure that the victim's airway is clear and unobstructed for effective breathing.
- Check Breathing: Look, listen, and feel for signs of breathing for no more than 10 seconds. If the victim is not breathing or only gasping, it's time to initiate CPR.
- Begin Chest Compressions: Place your hands on top of the victim's chest, with one hand on top of the other, and interlock your fingers. Position yourself directly over the victim's chest, ensuring your shoulders are aligned above your hands. Perform 30 chest compressions at a rate of 100 to 120 compressions per minute. Ensure each compression is deep enough to allow the chest to rise, but avoid excessive force.
- Give Rescue Breaths: After completing the cardiac massage, give two rescue breaths. With head tilted, pinch the victim's nose closed. Create a seal over their mouth with your mouth, and give two breaths, each lasting about one second. Ensure you see the victim's chest rise with each breath. if the chest does not rise, open the airway again and give 2nd breath.
- Continue CPR: Alternate between 30 chest compressions and two rescue breaths. Remember the sequence: "30:2". Continue CPR until the victim shows signs of movement, emergency medical services arrive, or until you are physically unable to continue.
- Use Hands-Only CPR if Unsure: If you are not trained in CPR that includes rescue breaths, or if you are uncomfortable performing rescue breaths, opt for hands-only CPR. Hands-only CPR involves solely performing cardiac massage at a rate of 100 to 120 compressions per minute until help arrives.
- Monitor the Victim: Continuously assess the victim's condition while performing Cardiopulmonary Resuscitation. Look for any signs of improvement, such as breathing, coughing, or movement. Be prepared to adjust your actions accordingly.
1. Assess the Scene
Before approaching the victim, it's crucial to ensure the safety of both yourself and the casualty. Taking a moment to assess the scene allows you to identify and mitigate potential dangers or hazards that could escalate the situation. Hazards such as traffic, fire, or electrical wires pose immediate risks to both you and the victim. By surveying the area, you make informed decisions about the best approach to providing assistance while minimizing the risk of harm to yourself and others. Ensuring the environment is safe before proceeding with any assistance is paramount to effective emergency response and prevents further injury or harm to all parties involved.
2. Check Responsiveness
Assessing the victim's responsiveness is an important step in CPR produre . It determines the severity of the situation and the appropriate course of action. By gently tapping the victim and shouting loudly, you attempt to elicit a response. This step is crucial as it provides vital information about the victim's level of consciousness and responsiveness. If there is no response, it signals the need for immediate action. Promptly calling for help or instructing someone nearby to call 911 ensures that professional medical assistance is on the way while you continue to assess the victim and initiate life-saving interventions.
3. Open the Airway
Opening the victim's airway is essential to ensure proper breathing and oxygenation. The "head tilted" technique, combined with lifting the chin forward, helps to straighten the airway passage, preventing obstruction and allowing air to flow freely into the lungs. This step is critical as it establishes a clear pathway for oxygen to enter the victim's body, enabling effective respiration and increasing the likelihood of survival.
4. Check Breathing
Checking for signs of breathing provides crucial information about the victim's respiratory status. Observing the rise and fall of the chest, listening for sounds of breathing, and feeling for breath on your cheek allows you to quickly assess whether the victim is breathing adequately. If the victim is not breathing or only gasping, it indicates a life-threatening emergency requiring immediate intervention. Promptly initiating CPR in such cases helps to maintain circulation and oxygenation until advanced medical help arrives.
5. Begin Chest Compressions
Starting chest compressions promptly is vital in maintaining blood circulation and delivering oxygen to vital organs, especially when the heart has stopped beating. Performing cardiac massage helps to manually pump blood throughout the body, sustaining vital organ function until the heart is restarted or advanced medical care is available. The rhythm and depth of compressions are crucial for effective circulation and should be performed at a steady rate of 100 to 120 compressions per minute, ensuring adequate blood flow to the brain and other vital organs.
6. Give Rescue Breaths
Providing rescue breaths helps to deliver oxygen to the victim's lungs, replenishing oxygen levels in the bloodstream and supporting vital organ function. By sealing the victim's airway and delivering breaths into their lungs, you assist in maintaining oxygenation and preventing brain damage due to oxygen deprivation. Rescue breaths are an integral part of CPR procedure and should be performed promptly after each cycle of chest compressions to optimize oxygen delivery and improve the chances of survival.
7. Continue CPR
Continuing cardiopulmonary resuscitative efforts in a consistent and uninterrupted manner is essential for sustaining blood circulation and oxygenation. Alternating between chest compressions and rescue breaths maintains a continuous flow of oxygenated blood to vital organs, maximizing the victim's chances of survival. Continuous monitoring of the victim's responsiveness and vital signs allows for timely adjustments to CPR procedure and ensures effective intervention until advanced medical assistance arrives.
8. Monitor the Victim
Continuous monitoring of the victim's condition is essential for assessing the effectiveness of CPR and making informed decisions about ongoing care. Observing for signs of improvement, such as breathing, coughing, or movement, provides valuable feedback on the effectiveness of cardiopulmonary revival interventions. Adjusting CPR techniques based on the victim's response ensures optimal circulation and oxygenation, enhancing the likelihood of a positive outcome.
CPR Procedure for Adults
- Check for responsiveness: Tap the person and shout loudly to check if they respond. If they don't respond, it indicate an emergency.
- Call for help: Call emergency services (e.g., 911 or your local emergency number) immediately for professional medical assistance.
- Open the airway: Tilt the head back and lift the chin up to open the airway.
- Check for breathing: Look, listen, and feel for signs of breathing for no more than 10 seconds. If the person is not breathing or only gasping, CPR is needed.
- Perform chest compressions: Place the heel of one hand on the center of the person's chest (just below the nipple line) and the other hand on top of the first hand. Use your body weight to compress the chest at least 2 inches (5 centimeters) deep at a rate of about 100-120 compressions per minute.
- Rescue breaths (optional): If you are trained and willing to perform rescue breaths, give two breaths after every 30 compressions. Ensure a good seal over the person's mouth with your mouth and deliver breaths over 1 second each.
- Continue CPR cycles: Continue with cycles of compressions and breaths until professional help arrives or the person starts breathing spontaneously.
CPR Procedure for Children (1 year to puberty)
The CPR procedure are similar to adult CPR, but there are slight modifications:
- If you are alone, perform CPR for about 2 minutes before calling emergency services.
- Use one or two hands for chest compressions, depending on the size of the child.
- Give rescue breaths if trained and comfortable. Use less force for compressions than with adults.
CPR Procedure for Infants (up to 1 year old)
The main steps of CPR Procedure are similar to adult CPR, but with some changes:
- For an unresponsive infant, check for responsiveness by tapping the baby's foot and shouting.
- If no response, call emergency services immediately.
- Use two fingers in the center of the chest just below the nipple line for chest compressions. Compress about 1.5 inches (4 centimeters) deep.
- For rescue breaths, cover the baby's mouth and nose with your mouth and deliver gentle puffs of air.
- Continue cycles of 30 compressions and 2 breaths until professional help arrives or the infant starts breathing on their own.
Learn the CPR Procedure, specifically for infants by enrolling in an infant cpr online certification.